Routing
So far we have seen a lot of this decorator in different forms.
But what is it? And how do we use it?
@app.route("/stairway")
    ...

@app.get("/to")
    ...

@app.post("/heaven")
    ...
Adding a route#
The most basic way to wire up a handler to an endpoint is with app.add_route().
See API docs for more details.
async def handler(request):
    return text("OK")

app.add_route(handler, "/test")
By default, routes are available as an HTTP GET call. You can change a handler to respond to one or more HTTP methods.
app.add_route(
    handler,
    '/test',
    methods=["POST", "PUT"],
)
Using the decorator syntax, the previous example is identical to this.
@app.route('/test', methods=["POST", "PUT"])
async def handler(request):
    return text('OK')
HTTP methods#
Each of the standard HTTP methods has a convenience decorator.
GET#
@app.get('/test')
async def handler(request):
    return text('OK')
POST#
@app.post('/test')
async def handler(request):
    return text('OK')
PUT#
@app.put('/test')
async def handler(request):
    return text('OK')
PATCH#
@app.patch('/test')
async def handler(request):
    return text('OK')
DELETE#
@app.delete('/test')
async def handler(request):
    return text('OK')
HEAD#
@app.head('/test')
async def handler(request):
    return empty()
OPTIONS#
@app.options('/test')
async def handler(request):
    return empty()
Warning
By default, Sanic will only consume the incoming request body on non-safe HTTP methods: POST, PUT, PATCH, DELETE. If you want to receive data in the HTTP request on any other method, you will need to do one of the following two options:
Option #1 - Tell Sanic to consume the body using ignore_body
@app.request("/path", ignore_body=False)
async def handler(_):
    ...
Option #2 - Manually consume the body in the handler using receive_body
@app.get("/path")
async def handler(request: Request):
    await request.receive_body()
Path parameters#
Sanic allows for pattern matching, and for extracting values from URL paths. These parameters are then injected as keyword arguments in the route handler.
@app.get("/tag/<tag>")
async def tag_handler(request, tag):
    return text("Tag - {}".format(tag))
You can declare a type for the parameter. This will be enforced when matching, and also will type cast the variable.
@app.get("/foo/<foo_id:uuid>")
async def uuid_handler(request, foo_id: UUID):
    return text("UUID - {}".format(foo_id))
For some standard types like str, int, and UUID, Sanic can infer the path parameter type from the function signature. This means that it may not always be necessary to include the type in the path parameter definition.
@app.get("/foo/<foo_id>")  # Notice there is no :uuid in the path parameter
async def uuid_handler(request, foo_id: UUID):
    return text("UUID - {}".format(foo_id))
Supported types#
str#
Regular expression applied: r"[^/]+"
Cast type: str
Example matches:
/path/to/Bob/path/to/Python%203
Beginning in v22.3 str will not match on empty strings. See strorempty for this behavior.
@app.route("/path/to/<foo:str>")
async def handler(request, foo: str):
    ...
strorempty#
Regular expression applied: r"[^/]*"
Cast type: str
Example matches:
/path/to/Bob/path/to/Python%203/path/to/
Unlike the str path parameter type, strorempty can also match on an empty string path segment.
Added in v22.3
@app.route("/path/to/<foo:strorempty>")
async def handler(request, foo: str):
    ...
int#
Regular expression applied: r"-?\d+"
Cast type: int
Example matches:
/path/to/10/path/to/-10
Does not match float, hex, octal, etc
@app.route("/path/to/<foo:int>")
async def handler(request, foo: int):
    ...
float#
Regular expression applied: r"-?(?:\d+(?:\.\d*)?|\.\d+)"
Cast type: float
Example matches:
/path/to/10/path/to/-10/path/to/1.5
@app.route("/path/to/<foo:float>")
async def handler(request, foo: float):
    ...
alpha#
Regular expression applied: r"[A-Za-z]+"
Cast type: str
Example matches:
/path/to/Bob/path/to/Python
Does not match a digit, or a space or other special character
@app.route("/path/to/<foo:alpha>")
async def handler(request, foo: str):
    ...
slug#
Regular expression applied: r"[a-z0-9]+(?:-[a-z0-9]+)*"
Cast type: str
Example matches:
/path/to/some-news-story/path/to/or-has-digits-123
Added in v21.6
@app.route("/path/to/<article:slug>")
async def handler(request, article: str):
    ...
path#
Regular expression applied: r"[^/].*?"
Cast type: str
Example matches:
/path/to/hello/path/to/hello.txt/path/to/hello/world.txt
@app.route("/path/to/<foo:path>")
async def handler(request, foo: str):
    ...
Warning
Because this will match on /, you should be careful and thoroughly test your patterns that use path so they do not capture traffic intended for another endpoint. Additionally, depending on how you use this type, you may be creating a path traversal vulnerability in your application. It is your job to protect your endpoint against this, but feel free to ask in our community channels for help if you need it :)
ymd#
Regular expression applied: r"^([12]\d{3}-(0[1-9]|1[0-2])-(0[1-9]|[12]\d|3[01]))"
Cast type: datetime.date
Example matches:
/path/to/2021-03-28
@app.route("/path/to/<foo:ymd>")
async def handler(request, foo: datetime.date):
    ...
uuid#
Regular expression applied: r"[A-Fa-f0-9]{8}-[A-Fa-f0-9]{4}-[A-Fa-f0-9]{4}-[A-Fa-f0-9]{4}-[A-Fa-f0-9]{12}"
Cast type: UUID
Example matches:
/path/to/123a123a-a12a-1a1a-a1a1-1a12a1a12345
@app.route("/path/to/<foo:uuid>")
async def handler(request, foo: UUID):
    ...
ext#
Regular expression applied: n/a Cast type: varies Example matches:
@app.route("/path/to/<foo:ext>")
async def handler(request, foo: str, ext: str):
    ...
| definition | example | filename | extension |
|---|---|---|---|
| <file:ext> | page.txt | "page" |
"txt" |
| <file:ext=jpg> | cat.jpg | "cat" |
"jpg" |
| <file:ext=jpg|png|gif|svg> | cat.jpg | "cat" |
"jpg" |
| <file=int:ext> | 123.txt | 123 |
"txt" |
| <file=int:ext=jpg|png|gif|svg> | 123.svg | 123 |
"svg" |
| <file=float:ext=tar.gz> | 3.14.tar.gz | 3.14 |
"tar.gz" |
File extensions can be matched using the special ext parameter type. It uses a special format that allows you to specify other types of parameter types as the file name, and one or more specific extensions as shown in the example table above.
It does not support the path parameter type.
Added in v22.3
regex#
Regular expression applied: whatever you insert
Cast type: str
Example matches:
/path/to/2021-01-01
This gives you the freedom to define specific matching patterns for your use case.
In the example shown, we are looking for a date that is in YYYY-MM-DD format.
@app.route(r"/path/to/<foo:([12]\d{3}-(0[1-9]|1[0-2])-(0[1-9]|[12]\d|3[01]))>")
async def handler(request, foo: str):
    ...
Regex Matching#
More often than not, compared with complex routing, the above example is too simple, and we use a completely different routing matching pattern, so here we will explain the advanced usage of regex matching in detail.
Sometimes, you want to match a part of a route:
/image/123456789.jpg
If you wanted to match the file pattern, but only capture the numeric portion, you need to do some regex fun 😄:
app.route(r"/image/<img_id:(?P<img_id>\d+)\.jpg>")
Further, these should all be acceptable:
@app.get(r"/<foo:[a-z]{3}.txt>")                # matching on the full pattern
@app.get(r"/<foo:([a-z]{3}).txt>")              # defining a single matching group
@app.get(r"/<foo:(?P<foo>[a-z]{3}).txt>")       # defining a single named matching group
@app.get(r"/<foo:(?P<foo>[a-z]{3}).(?:txt)>")   # defining a single named matching group, with one or more non-matching groups
Also, if using a named matching group, it must be the same as the segment label.
@app.get(r"/<foo:(?P<foo>\d+).jpg>")  # OK
@app.get(r"/<foo:(?P<bar>\d+).jpg>")  # NOT OK
For more regular usage methods, please refer to Regular expression operations
Generating a URL#
Sanic provides a method to generate URLs based on the handler method name: app.url_for(). This is useful if you want to avoid hardcoding url paths into your app; instead, you can just reference the handler name.
@app.route('/')
async def index(request):
    # generate a URL for the endpoint `post_handler`
    url = app.url_for('post_handler', post_id=5)

    # Redirect to `/posts/5`
    return redirect(url)

@app.route('/posts/<post_id>')
async def post_handler(request, post_id):
    ...
You can pass any arbitrary number of keyword arguments. Anything that is not a request parameter will be implemented as a part of the query string.
assert app.url_for(
    "post_handler",
    post_id=5,
    arg_one="one",
    arg_two="two",
) == "/posts/5?arg_one=one&arg_two=two"
Also supported is passing multiple values for a single query key.
assert app.url_for(
    "post_handler",
    post_id=5,
    arg_one=["one", "two"],
) == "/posts/5?arg_one=one&arg_one=two"
Special keyword arguments#
See API Docs for more details.
app.url_for("post_handler", post_id=5, arg_one="one", _anchor="anchor")
# '/posts/5?arg_one=one#anchor'

# _external requires you to pass an argument _server or set SERVER_NAME in app.config if not url will be same as no _external
app.url_for("post_handler", post_id=5, arg_one="one", _external=True)
# '//server/posts/5?arg_one=one'

# when specifying _scheme, _external must be True
app.url_for("post_handler", post_id=5, arg_one="one", _scheme="http", _external=True)
# 'http://server/posts/5?arg_one=one'

# you can pass all special arguments at once
app.url_for("post_handler", post_id=5, arg_one=["one", "two"], arg_two=2, _anchor="anchor", _scheme="http", _external=True, _server="another_server:8888")
# 'http://another_server:8888/posts/5?arg_one=one&arg_one=two&arg_two=2#anchor'
Customizing a route name#
A custom route name can be used by passing a name argument while registering the route.
@app.get("/get", name="get_handler")
def handler(request):
    return text("OK")
Now, use this custom name to retrieve the URL
assert app.url_for("get_handler", foo="bar") == "/get?foo=bar"
Websockets routes#
Websocket routing works similar to HTTP methods.
async def handler(request, ws):
    message = "Start"
    while True:
        await ws.send(message)
        message = await ws.recv()

app.add_websocket_route(handler, "/test")
It also has a convenience decorator.
@app.websocket("/test")
async def handler(request, ws):
    message = "Start"
    while True:
        await ws.send(message)
        message = await ws.recv()
Read the websockets section to learn more about how they work.
Strict slashes#
Sanic routes can be configured to strictly match on whether or not there is a trailing slash: /. This can be configured at a few levels and follows this order of precedence:
- Route
- Blueprint
- BlueprintGroup
- Application
# provide default strict_slashes value for all routes
app = Sanic(__file__, strict_slashes=True)
# overwrite strict_slashes value for specific route
@app.get("/get", strict_slashes=False)
def handler(request):
    return text("OK")
# it also works for blueprints
bp = Blueprint(__file__, strict_slashes=True)

@bp.get("/bp/get", strict_slashes=False)
def handler(request):
    return text("OK")
bp1 = Blueprint(name="bp1", url_prefix="/bp1")
bp2 = Blueprint(
    name="bp2",
    url_prefix="/bp2",
    strict_slashes=False,
)

# This will enforce strict slashes check on the routes
# under bp1 but ignore bp2 as that has an explicitly
# set the strict slashes check to false
group = Blueprint.group([bp1, bp2], strict_slashes=True)
Static files#
In order to serve static files from Sanic, use app.static().
The order of arguments is important:
- Route the files will be served from
- Path to the files on the server
See API docs for more details.
app.static("/static/", "/path/to/directory/")
Tip
It is generally best practice to end your directory paths with a trailing slash (/this/is/a/directory/). This removes ambiguity by being more explicit.
You can also serve individual files.
app.static("/", "/path/to/index.html")
It is also sometimes helpful to name your endpoint
app.static(
    "/user/uploads/",
    "/path/to/uploads/",
    name="uploads",
)
Retrieving the URLs works similar to handlers. But, we can also add the filename argument when we need a specific file inside a directory.
assert app.url_for(
    "static",
    name="static",
    filename="file.txt",
) == "/static/file.txt"
assert app.url_for(
    "static",
    name="uploads",
    filename="image.png",
) == "/user/uploads/image.png"
Tip
If you are going to have multiple static() routes, then it is highly suggested that you manually name them. This will almost certainly alleviate potential hard to discover bugs.
app.static("/user/uploads/", "/path/to/uploads/", name="uploads")
app.static("/user/profile/", "/path/to/profile/", name="profile_pics")
Auto index serving#
If you have a directory of static files that should be served by an index page, you can provide the filename of the index. Now, when reaching that directory URL, the index page will be served.
app.static("/foo/", "/path/to/foo/", index="index.html")
Added in v23.3
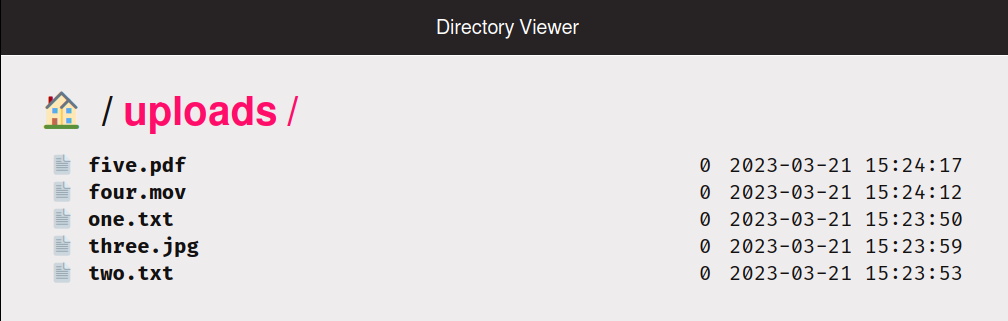
File browser#
When serving a directory from a static handler, Sanic can be configured to show a basic file browser instead using directory_view=True.
app.static("/uploads/", "/path/to/dir", directory_view=True)
You now have a browsable directory in your web browser:
Added in v23.3
Symlink control#
New in v25.12
This feature was added in version 25.12
By default, Sanic will not follow symlinks that point outside the static root directory for security reasons. You can enable external symlinks separately for files and directories using follow_external_symlink_files and follow_external_symlink_dirs.
# Allow file symlinks pointing outside static root
app.static(
    "/static",
    "/var/www/static",
    follow_external_symlink_files=True,
)

# Allow directory symlinks pointing outside static root
app.static(
    "/static",
    "/var/www/static",
    follow_external_symlink_dirs=True,
)
Symlinks within the static root always work regardless of these settings. Broken symlinks are always hidden from directory listings and return 404.
Added in v25.12
Route context#
When a route is defined, you can add any number of keyword arguments with a ctx_ prefix. These values will be injected into the route ctx object.
@app.get("/1", ctx_label="something")
async def handler1(request):
    ...

@app.get("/2", ctx_label="something")
async def handler2(request):
    ...

@app.get("/99")
async def handler99(request):
    ...

@app.on_request
async def do_something(request):
    if request.route.ctx.label == "something":
        ...
Added in v21.12